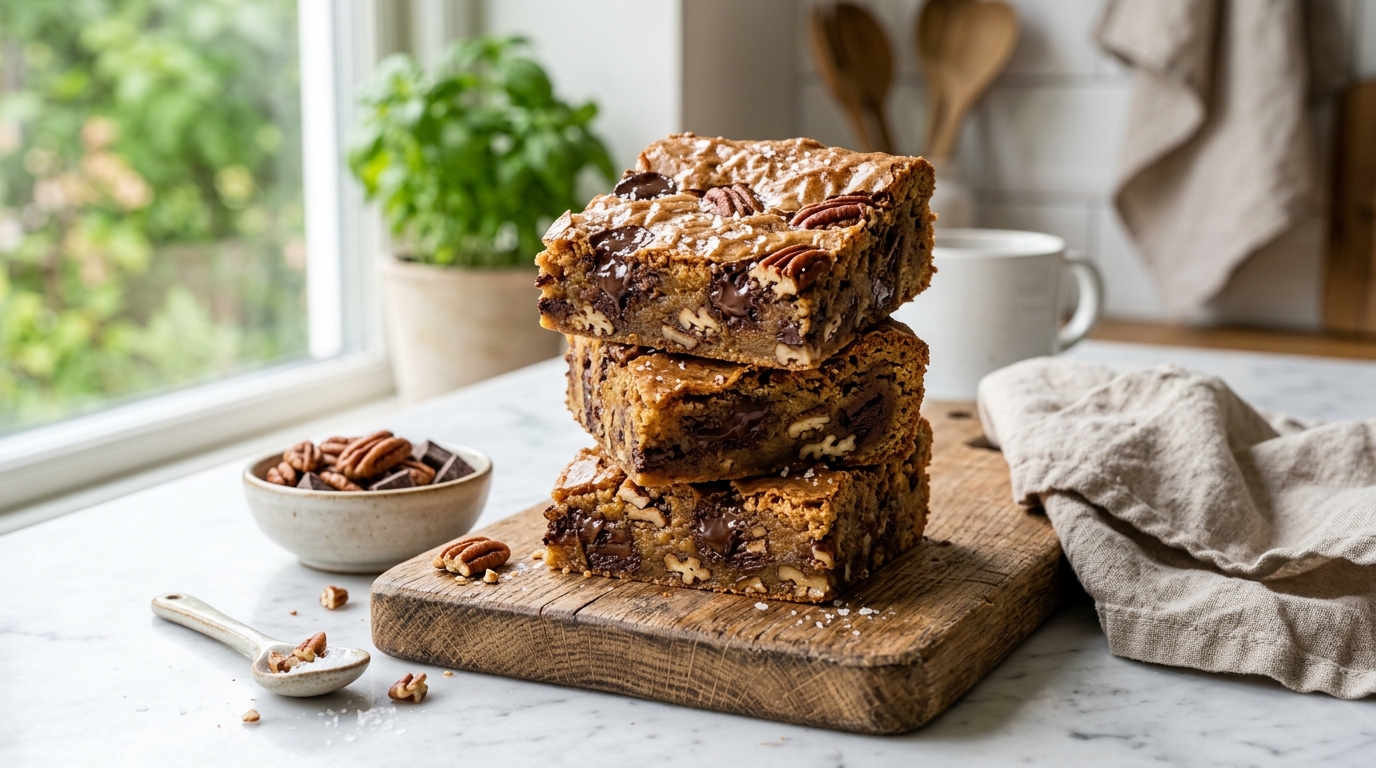
If you find yourself torn between the gooey decadence of a chocolate chip cookie and the thick, dense chewiness of a brownie, this recipe is the ultimate compromise. These Chocolate Pecan Blondies offer a brilliant balance of rich, butterscotch-like sweetness, melted chocolate chips, and the savory, roasted crunch of chopped pecans.
The secret to an unforgettable blondie lies in the base ingredients. By using melted butter and brown sugar, you create a deep, caramel-like flavor profile that serves as the perfect canvas for your mix-ins. Tossing your chocolate chips and pecans in the dry flour before folding everything together ensures every single square is perfectly loaded with goodies.
Although baking blondies from scratch might sound like it takes a lot of effort, this recipe is incredibly fast and foolproof. You don’t need a stand mixer, and the batter comes together in just 15 minutes.
Whether packed into a lunchbox, served at a holiday potluck, or enjoyed warm with a scoop of vanilla ice cream, these Chocolate Pecan Blondies are guaranteed to become a highly requested favorite in your home.
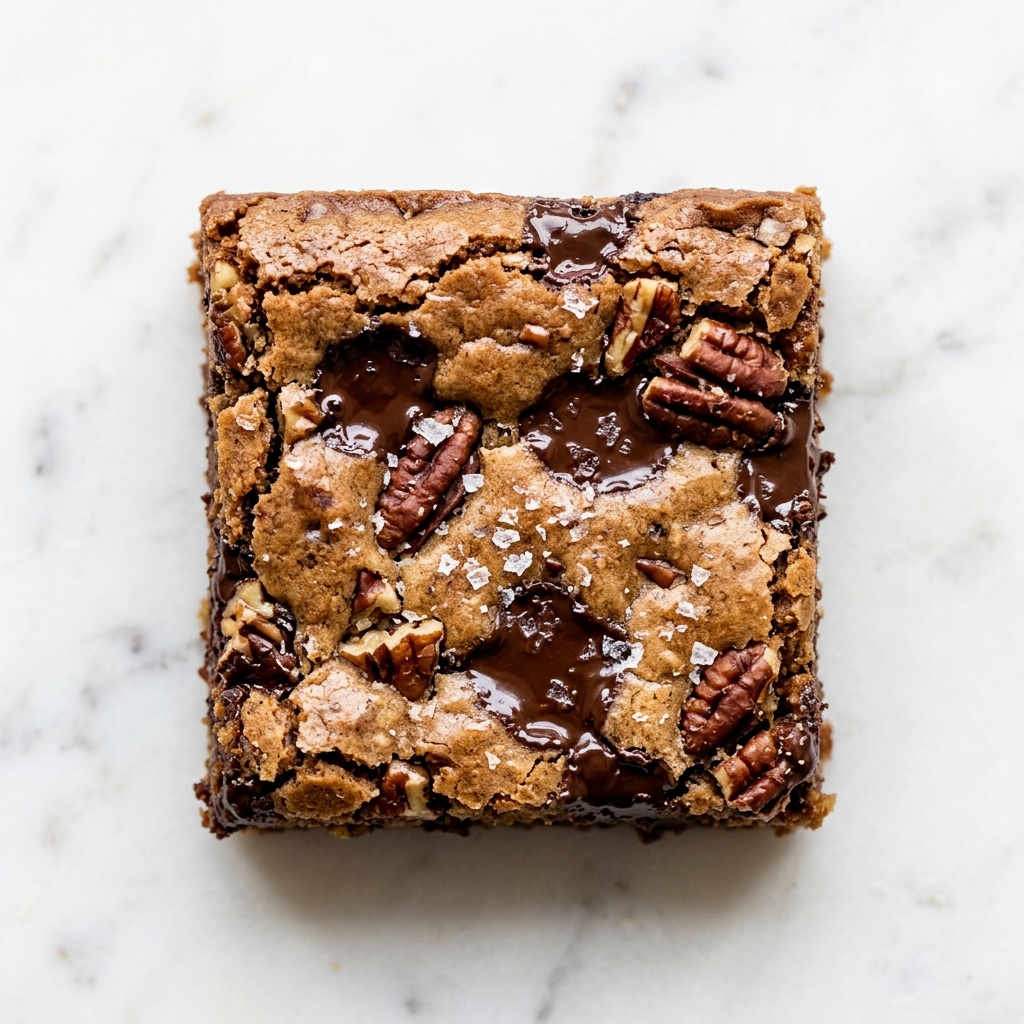
Chocolate Pecan Blondies | Chewy & Easy Bakery Recipe
Ingredients
Equipment
Method
1. Preheat and Prep
Preheat your oven to 350°F (180°C). Line an 8×8-inch baking tray with parchment paper, leaving a slight overhang on the edges to make it easy to lift the blondies out later.2. Mix the Butter and Sugar
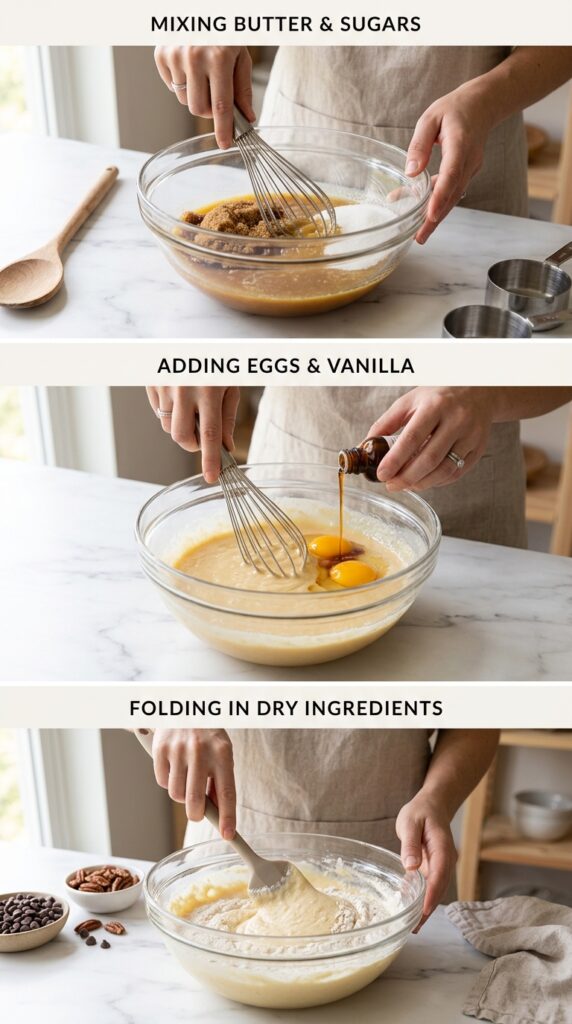
In a large mixing bowl, whisk together the melted, cooled unsalted butter and the brown sugar until it comes together. (Note: Because it is melted butter, it won't cream completely smoothly, which is perfectly fine!)3. Add Eggs and Vanilla
Whisk the eggs, vanilla extract, and table salt into the butter and sugar mixture. Whisk vigorously until it forms a single, cohesive, slightly glossy mixture.4. Toss the Dry Ingredients
In a separate medium bowl, combine the sifted all-purpose flour, baking powder, chopped pecans, and chocolate chips. Toss everything together so the nuts and chocolate are coated in the flour. (This prevents them from sinking to the bottom while baking!)5. Combine and Fold
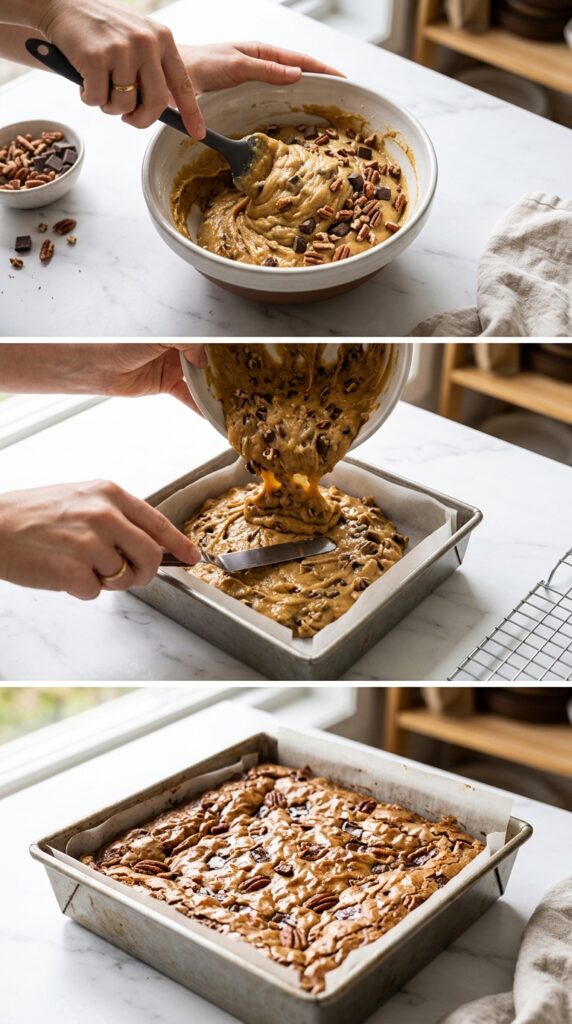
Transfer all the dry ingredients into the bowl with the wet ingredients. Using a rubber spatula, gently fold the ingredients together until it forms a thick, sticky batter and no streaks of dry flour remain. Do not overmix!6. Bake
Spread the thick batter evenly into your prepared baking pan, smoothing the top with your spatula. Bake in the preheated oven for 22 to 26 minutes. (Keep a close watch after the 20-minute mark!) They are done when the top is golden brown and the edges are slightly shrinking away from the sides of the pan.7. Cool and Slice
Remove from the oven and let the blondies rest in the pan for at least 30 minutes before slicing and serving. (If you are storing them, let them cool for a full 1 hour). Lift them out using the parchment paper overhang, slice into squares, and enjoy!
Notes
- Sugar Types: While you can use a mixture of white and brown sugar, using 100% brown sugar yields the chewiest, most flavorful butterscotch base.
- Pan Size: If you use a slightly smaller 7×7-inch pan, they will be thicker and will need about 21 to 24 minutes to bake.
-
Storage: Best eaten within a week! Store in an airtight container at room temperature.Overbaking is the enemy of a chewy blondie! Pull them out of the oven as soon as the edges are golden and slightly pulling away from the pan—the center will finish setting as it cools.
Why You’ll Love These Chocolate Pecan Blondies
There are countless reasons this recipe will quickly become your new go-to baking project.
- Incredible chewy, dense, and fudgy texture
- Deep butterscotch and caramel notes from the brown sugar
- Packed with melted chocolate and crunchy roasted pecans
- Very easy to make—no stand mixer required!
- Ready from start to finish in under an hour
- Perfect ratio of sweet and salty flavors
- Simple ingredients you already have in your pantry
- Slices beautifully into perfect squares
- Stays soft and chewy for days
Every single bite tastes like a cozy, bakery-quality treat.
What Makes a Great Blondie?
The best blondies strike a delicate balance. They should be rich and buttery, with a shiny, slightly crackly top and an interior that is dense and chewy—never cakey or dry!
Moisture and sugar are the two most crucial elements. Using melted butter instead of creamed butter prevents too much air from getting into the batter, ensuring that dense, fudgy texture. Pairing that melted butter with brown sugar (which contains molasses) gives the blondies their signature chewiness and deep caramel flavor.
Equally important is knowing when to take them out of the oven. Overbaking is the enemy of a good blondie. Pulling them out just as the edges turn golden brown and begin to shrink slightly from the sides of the pan ensures the center finishes baking gently in the residual heat, leaving you with that sought-after gooey texture.
Ingredient Highlights
Simple, high-quality ingredients come together to create a truly memorable dessert.
Melted Butter & Brown Sugar
½ cup (120g) of melted and cooled unsalted butter combined with ¾ cup (140g) of brown sugar creates the ultimate moist, butterscotch foundation. (You can use white sugar, but brown sugar is highly recommended for the best flavor and chew!)
Eggs & Vanilla
2 large eggs bind the batter together, while 1 teaspoon of vanilla extract enhances all the rich, caramel notes.
The Dry Base
1 ½ cups (180g) of all-purpose flour provides the structure, balanced with ½ teaspoon of baking powder for a slight lift and ¼ teaspoon of table salt to cut the sweetness.
Pecans & Chocolate
½ cup (100g) of chopped pecans and ½ cup (100g) of chocolate chips are the star mix-ins. Tossing them with the flour ensures they don’t sink to the bottom of the pan while baking!
Tips for the Best Chocolate Pecan Blondies
Follow these simple tips for perfect, coffee-shop-quality results every time.
Let the Butter Cool
After melting your butter, let it cool for a few minutes before whisking in your sugar and eggs. If the butter is boiling hot, it will melt the sugar prematurely and scramble the eggs!
Coat the Mix-Ins
Mixing the chopped pecans and chocolate chips into the bowl of dry ingredients (flour, baking powder, and salt) before adding them to the wet ingredients is a brilliant baker’s trick. The flour coats the heavy mix-ins, preventing them from sinking to the bottom of the pan.
Don’t Over-Mix
When combining the wet and dry ingredients, use a spatula to gently fold them together just until you no longer see streaks of dry flour. The batter will be thick and sticky! Over-mixing develops gluten, which can make the blondies tough.
Let Them Rest
It is tempting to cut into blondies while they are piping hot, but you must let them rest! Allowing them to cool in the pan for at least 30 minutes sets the crumb, ensuring you get clean, beautiful slices instead of a crumbly mess.
Easy Variations
Customize your blondies with these delicious ideas.
White Chocolate Macadamia
Swap the semi-sweet chocolate chips for white chocolate chips and replace the pecans with chopped, roasted macadamia nuts.
Salted Caramel Pecan
Drizzle the top of the raw batter with 3 tablespoons of thick caramel sauce and swirl it in with a knife before baking. Top with flaky sea salt as soon as it comes out of the oven!
Bourbon Pecan Blondies
Add 1 tablespoon of your favorite bourbon to the wet ingredients for a warm, cozy, adult-friendly twist.
What to Serve with Blondies
A warm, fudgy blondie pairs beautifully with both hot and cold accompaniments.
Serve them with:
- A massive scoop of Vanilla Bean or Butter Pecan Ice Cream
- A drizzle of warm hot fudge or caramel sauce
- A hot cup of dark roast coffee or an espresso
- An ice-cold glass of milk
- A cozy cup of Chai tea
Storage & Freezing Instructions
Room Temperature: Store baked and cooled blondies in an airtight container at room temperature for up to 1 week. (Keeping a slice of sandwich bread in the container helps keep them perfectly soft!)
Freezing: Blondies freeze incredibly well. Wrap the completely cooled block of blondies (or individual squares) tightly in plastic wrap, then place in a freezer-safe bag for up to 3 months. Thaw at room temperature.
Common Mistakes to Avoid
Avoid these common baking pitfalls for perfect blondies every time.
Using Only White Sugar
While you can use white granulated sugar, doing so will result in a blondie that tastes somewhat flat and lacks the signature chewiness and butterscotch flavor that molasses-rich brown sugar provides.
Overbaking the Blondies
If you bake them until a toothpick comes out completely bone-dry, they will be cakey and hard once they cool. Start checking them closely at the 20-minute mark!
Forgetting the Parchment Paper
Blondies are sticky! Always line your 8×8-inch pan with parchment paper, leaving a little overhang on the edges so you can easily lift the entire block out of the pan for clean slicing.
Frequently Asked Questions
Can I use a 9×9 inch pan instead of an 8×8?
Yes! However, because the batter will be spread thinner in a 9×9 pan, they will bake faster and yield slightly thinner blondies. Start checking them for doneness around the 18-minute mark.
Do I have to roast the pecans?
While you can use raw pecans, lightly roasting or toasting them first draws out their natural oils, making them crunchier and infinitely more flavorful in the finished blondie.
Why did my blondies sink in the middle?
Sinking in the middle usually means the blondies were severely underbaked, or the oven door was opened and closed too many times during the baking process, causing a sudden drop in temperature.
Final Thoughts
These Chocolate Pecan Blondies are everything a homemade dessert should be—dense, chewy, buttery, and packed with sweet chocolate and roasted nuts. By utilizing brown sugar and avoiding overbaking, you can skip the bakery and enjoy professional-quality treats right in your own kitchen.
Serve them warm with a scoop of ice cream or enjoy them as a sweet midday snack. However you serve them, this foolproof recipe is sure to become a staple in your baking repertoire.
If you loved this Chocolate Pecan Blondie recipe, save it on Pinterest, share it with family and friends, and let us know your favorite mix-ins in the comments. Happy baking!