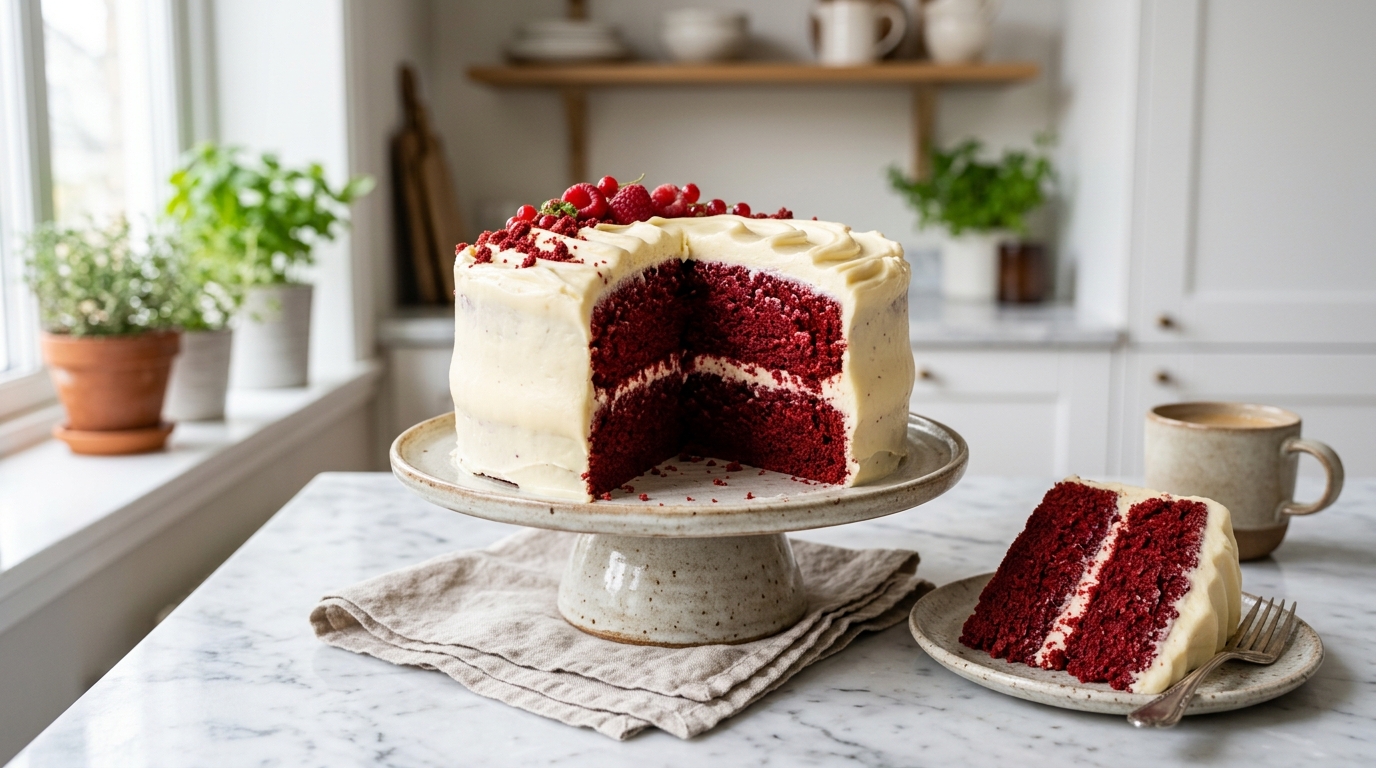
Nothing says celebration quite like a beautiful Red Velvet Cake. With its vibrant red layers, soft and velvety crumb, subtle hint of cocoa, and rich cream cheese frosting, this timeless dessert has earned its place as one of America’s most loved cakes. Whether you’re baking for a birthday, Valentine’s Day, Christmas, or simply because you’re craving something special, this homemade Red Velvet Cake is guaranteed to impress.
Unlike a traditional chocolate cake, Red Velvet Cake offers a delicate balance of flavors. It has just enough cocoa to add richness without overpowering the cake, while buttermilk and sour cream create an incredibly moist, tender texture. Finished with a silky cream cheese frosting, every bite is creamy, fluffy, and perfectly balanced between sweet and tangy.
The best part? Making bakery-quality Red Velvet Cake at home is much easier than you might think. With simple ingredients and a few helpful tips, you can create a stunning layer cake that’s every bit as beautiful as it is delicious.
Whether you’re an experienced baker or trying your first layer cake, this recipe will quickly become one you’ll return to for every special occasion.
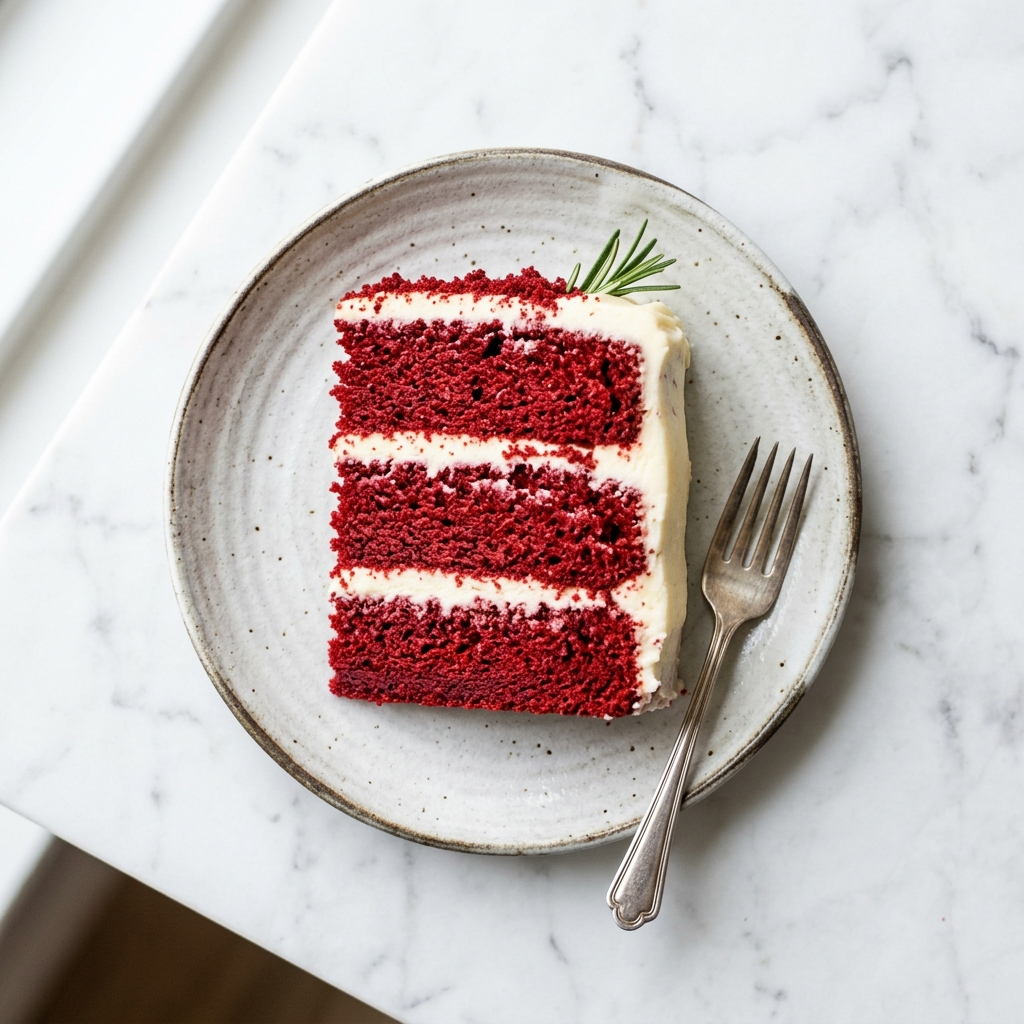
Red Velvet Cake | Moist Homemade Cake with Cream Cheese Frosting
Ingredients
Equipment
Method
- Preheat the oven to 350°F (175°C). Grease and line two 9-inch round cake pans with parchment paper.
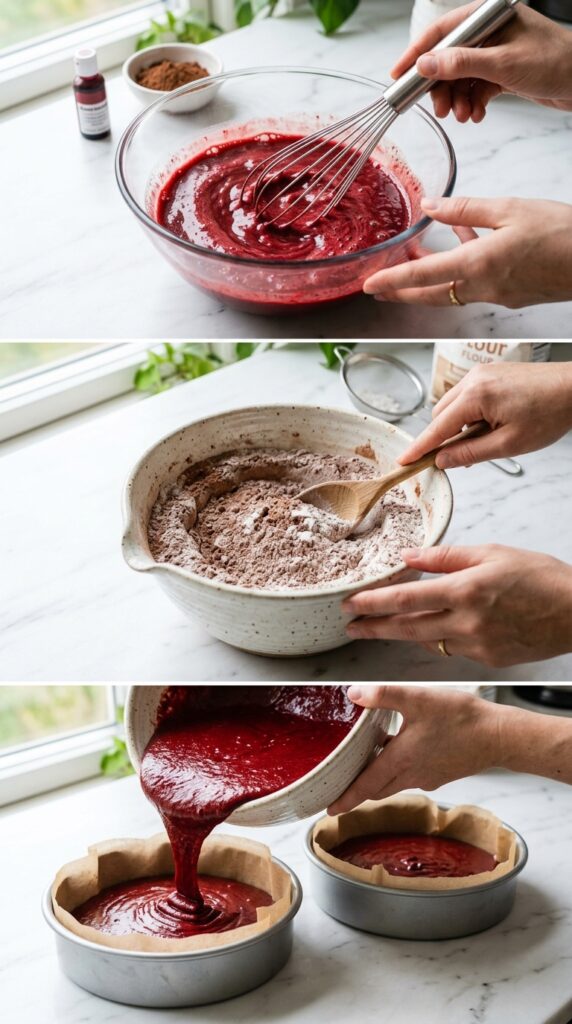
- In a large bowl, whisk together the flour, sugar, cocoa powder, baking soda, baking powder, and salt.
- In another bowl, whisk the eggs, oil, buttermilk, sour cream, vanilla, food coloring, and vinegar until smooth.
- Gradually add the wet ingredients to the dry ingredients and mix just until combined. Do not overmix.
- Divide the batter evenly between the prepared cake pans and smooth the tops.
- Bake for 30–35 minutes, or until a toothpick inserted into the center comes out clean or with a few moist crumbs.
- Let the cakes cool in the pans for 10 minutes before transferring them to a wire rack to cool completely.
- For the frosting, beat the cream cheese and butter until light and fluffy. Gradually add the powdered sugar, then mix in the vanilla and salt until smooth.
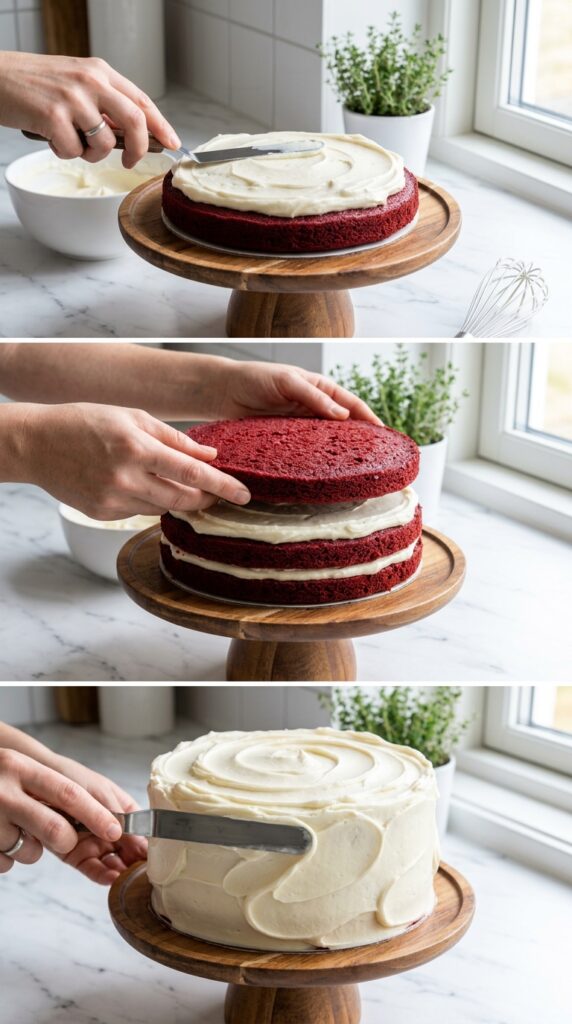
- Level the cooled cake layers if needed. Spread frosting between the layers, over the top, and around the sides of the cake.
- Refrigerate the cake for about 30 minutes before slicing for cleaner cuts.
Notes
- Do not overmix the batter or the cake may become dense.
- Gel food coloring creates a deeper red color without thinning the batter.
- Chill the frosted cake before slicing for neat, bakery-style layers.
- Store covered in the refrigerator for up to 5 days.
- Bring to room temperature before serving for the best flavor and texture.Use room-temperature ingredients to create a smooth batter and a light, tender cake.
Why You’ll Love This Red Velvet Cake
There are plenty of reasons this recipe stands out.
- Soft, moist, and fluffy texture
- Beautiful vibrant red color
- Light cocoa flavor
- Rich cream cheese frosting
- Perfect for birthdays and holidays
- Easy-to-follow recipe
- Bakery-style results at home
- Great for making ahead
- Ideal for celebrations
- A timeless classic everyone loves
Every slice is rich, elegant, and guaranteed to disappear quickly.
What Makes Red Velvet Cake Special?
Red Velvet Cake isn’t simply a chocolate cake dyed red. Its unique combination of cocoa powder, buttermilk, vinegar, and vanilla creates a flavor that’s smooth, slightly tangy, and incredibly balanced.
The buttermilk keeps the cake moist while adding a gentle tang that complements the sweet frosting. A small amount of cocoa powder adds richness without making the cake taste heavily chocolatey. The signature red color makes the cake instantly recognizable and perfect for festive occasions.
Paired with creamy cream cheese frosting, it’s a dessert that’s both visually stunning and irresistibly delicious.
Ingredient Highlights
Simple ingredients come together to create a memorable cake.
All-Purpose Flour
Flour provides the structure that keeps the cake soft while supporting the rich frosting.
Measure carefully to avoid a dense cake.
Cocoa Powder
Only a small amount is needed to create Red Velvet Cake’s signature mild chocolate flavor.
Use unsweetened cocoa powder for the best results.
Buttermilk
Buttermilk gives the cake its tender crumb and slight tang.
If you don’t have buttermilk, you can make a quick substitute by adding one tablespoon of lemon juice or white vinegar to one cup of milk and letting it sit for five minutes.
Sour Cream
Sour cream adds extra moisture and richness, helping the cake stay soft for days.
Cream Cheese
The frosting wouldn’t be complete without full-fat cream cheese.
Its tangy flavor perfectly balances the sweetness of the cake.
Tips for the Best Red Velvet Cake
Follow these simple tips for perfect results every time.
Use Room-Temperature Ingredients
Eggs, buttermilk, sour cream, and cream cheese mix together much more smoothly when they’re at room temperature.
This creates a lighter, more even batter.
Don’t Overmix
Mix only until the ingredients are combined.
Overmixing develops gluten, resulting in a tougher cake.
Measure Flour Correctly
Too much flour can make the cake dry.
Use the spoon-and-level method for the most accurate measurement.
Cool Completely Before Frosting
Warm cake layers will melt the frosting.
Allow the cakes to cool completely before assembling.
Chill Before Serving
Refrigerating the frosted cake for 30 minutes makes slicing easier and creates clean, professional-looking layers.
Easy Variations
Customize your Red Velvet Cake for any occasion.
Red Velvet Cupcakes
Bake the batter in cupcake liners for individual desserts.
Reduce the baking time to about 18–22 minutes.
Red Velvet Sheet Cake
Bake the batter in a 9×13-inch pan for an easy party dessert.
Chocolate Chip Red Velvet Cake
Fold mini chocolate chips into the batter for extra bursts of chocolate.
Layered Celebration Cake
Decorate with fresh berries, white chocolate curls, or festive sprinkles for birthdays and holidays.
Red Velvet Bundt Cake
Bake the batter in a Bundt pan and finish with a cream cheese glaze.
Mini Red Velvet Cakes
Use smaller cake pans for adorable individual celebration cakes.
What to Serve with Red Velvet Cake
This cake pairs beautifully with a variety of drinks and desserts.
Enjoy it with:
- Hot Coffee
- Espresso
- Mocha Frappuccino
- Iced Coffee
- Homemade Hot Chocolate
- Vanilla Latte
- Fresh Strawberries
- Raspberry Sauce
- Vanilla Ice Cream
- Whipped Cream
Its rich flavor makes it the perfect centerpiece for dessert tables and holiday gatherings.
Make-Ahead Tips
Red Velvet Cake is an excellent make-ahead dessert.
Bake the cake layers one day in advance and wrap them tightly in plastic wrap once completely cool. Store them at room temperature overnight or refrigerate them if your kitchen is warm.
The frosting can also be prepared ahead and refrigerated. Let it soften slightly before spreading.
Assemble the cake the day you plan to serve it for the freshest presentation.
Storage Instructions
Store the frosted cake covered in the refrigerator for up to 5 days.
Allow slices to sit at room temperature for about 20 minutes before serving for the best texture and flavor.
Freezing Instructions
The unfrosted cake layers freeze beautifully.
Wrap each layer tightly in plastic wrap and aluminum foil before freezing for up to 3 months.
Thaw overnight in the refrigerator before frosting.
You can also freeze individual slices for easy desserts whenever a craving strikes.
Common Mistakes to Avoid
Avoid these common baking mistakes for bakery-quality results.
Overmixing the Batter
Too much mixing creates a dense cake.
Mix only until the ingredients are combined.
Using Cold Ingredients
Cold ingredients don’t blend smoothly, resulting in uneven batter.
Bring refrigerated ingredients to room temperature before baking.
Overbaking
Bake only until a toothpick comes out clean or with a few moist crumbs.
Overbaking dries out the cake.
Frosting a Warm Cake
Always cool the cake completely before frosting.
Otherwise, the frosting will melt and slide off.
Skipping the Cooling Rack
Cooling on a wire rack helps the cakes cool evenly and prevents soggy bottoms.
Frequently Asked Questions
Why is it called Red Velvet Cake?
The cake gets its name from its soft, velvety texture and signature deep red color.
Does Red Velvet Cake taste like chocolate?
It has a mild chocolate flavor from cocoa powder, but it’s much lighter than a traditional chocolate cake.
Can I make it ahead of time?
Yes. Red Velvet Cake is even better the next day after the flavors have had time to develop.
Can I use gel food coloring?
Absolutely.
Gel food coloring creates a richer red color without adding extra liquid to the batter.
Why use buttermilk?
Buttermilk helps create the cake’s soft crumb while adding a subtle tang that balances the sweetness.
Can I freeze Red Velvet Cake?
Yes.
Both the unfrosted cake layers and frosted slices freeze well for up to three months.
Why Red Velvet Cake Is a Timeless Favorite
Red Velvet Cake has remained a beloved dessert for generations because it combines elegance with comfort. Its striking appearance makes it perfect for celebrations, while its soft texture and creamy frosting make it irresistible year-round.
From birthdays and weddings to Christmas dinners and Valentine’s Day celebrations, this cake always feels festive and special. It’s a recipe that looks impressive yet is surprisingly approachable for home bakers.
With its beautiful layers, rich flavor, and classic cream cheese frosting, it’s easy to see why Red Velvet Cake continues to be one of the most popular homemade cakes.
Final Thoughts
This Red Velvet Cake is everything a classic layer cake should be—soft, moist, fluffy, and topped with a rich cream cheese frosting that perfectly complements its subtle cocoa flavor. Its beautiful red color and tender crumb make it ideal for birthdays, holidays, anniversaries, or any celebration worth remembering.
Whether you’re baking it for a special occasion or simply because you love homemade desserts, this recipe delivers bakery-style results with simple ingredients and easy-to-follow steps. Once you try it, it’s sure to become one of your favorite cakes to bake and share.
If you loved this Red Velvet Cake recipe, save it on Pinterest, share it with friends and family, and let us know how you decorated your cake or any fun variations you tried in the comments. Happy baking!